For the Subscriber Administrator: If you have administrative responsibility for setting up Locations, Users, and AEDs within AED Readiness Manager for your organization, please click here for Software Setup Instructions
For installers with AED Readiness Manager administrative privileges: If you have been set up by the Subscriber Administrator as a User with administrative privileges in AED Readiness Manager and will be installing one or more AED Sentinel Monitoring Cameras (“Cameras”), please follow these instructions to create and populate AED records in the software.
Preparation
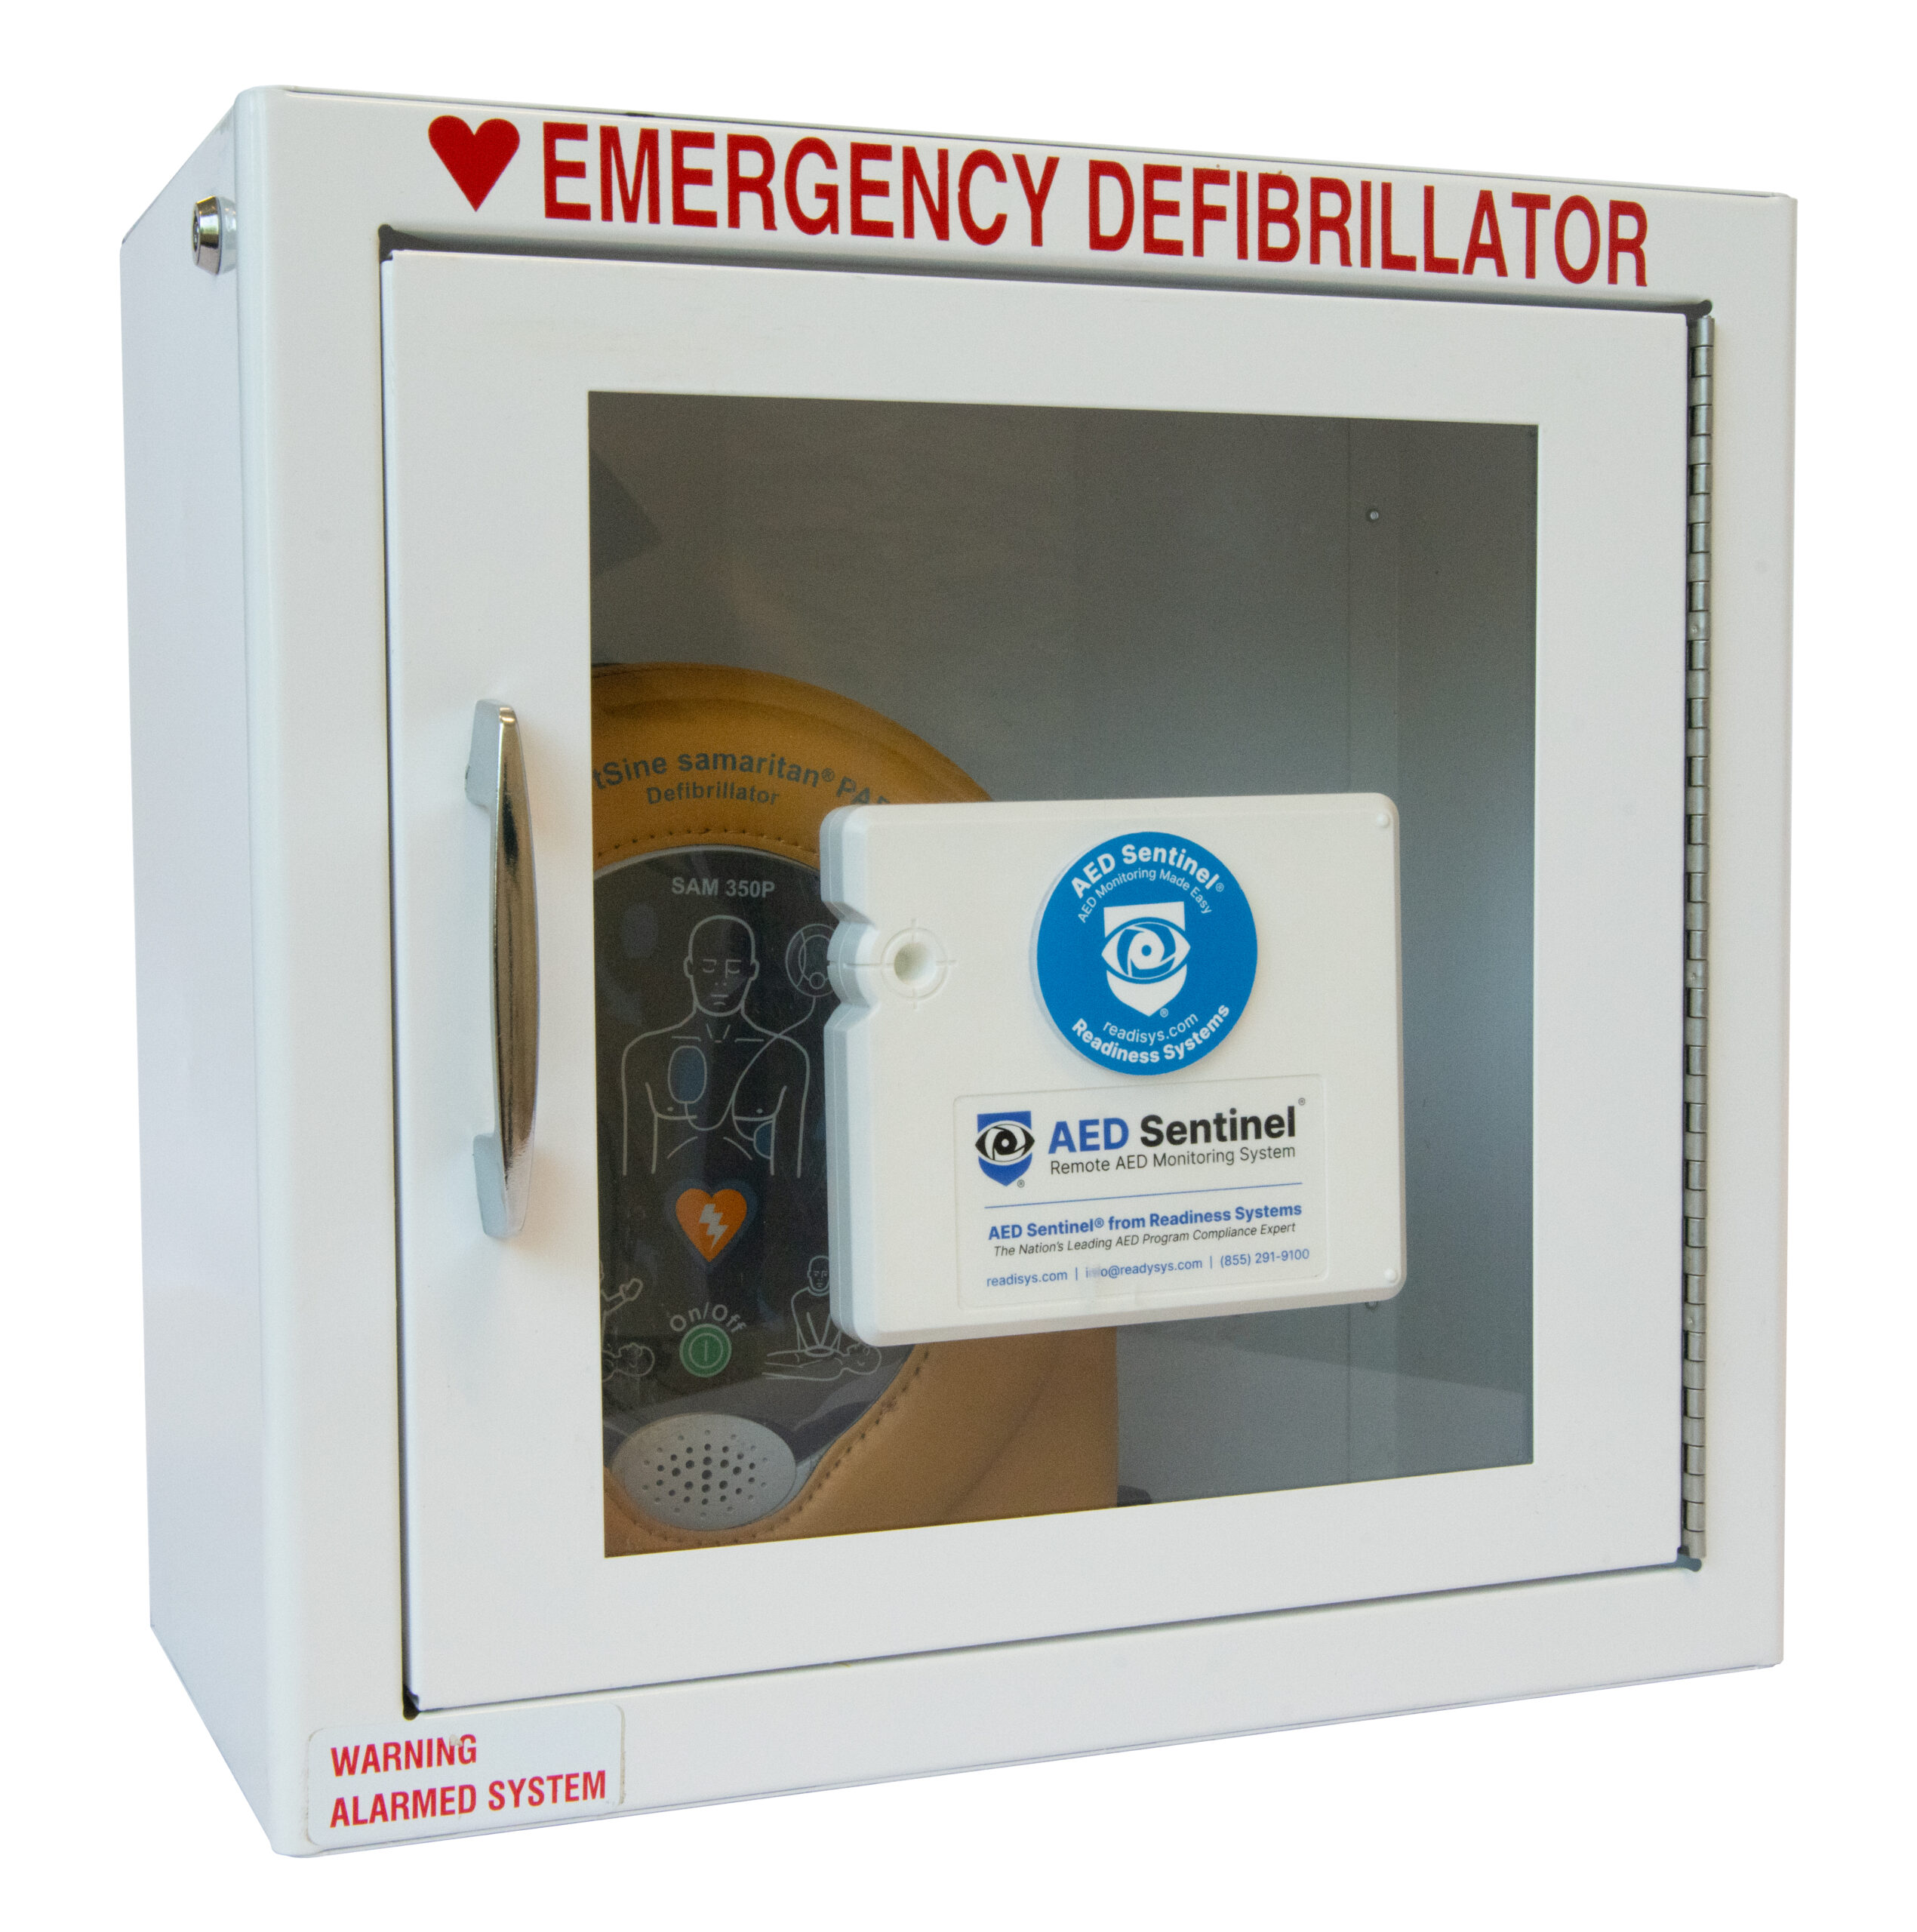
Remove the AED from the cabinet.
Locate the following information for the AED:
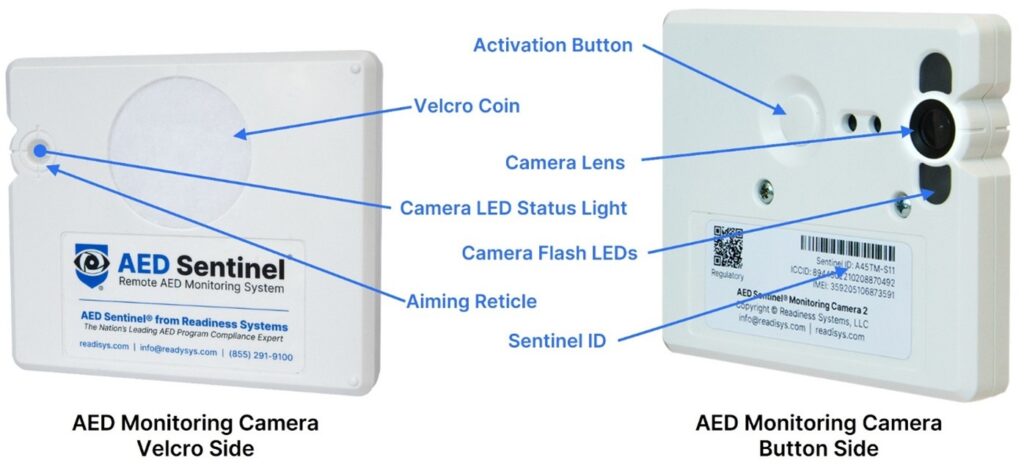
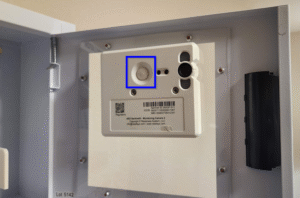
Sentinel ID (printed on the label found on the button side of the camera)
If you didn’t receive or forgot your password, click on “Forgot your password?” and, using your User email address, follow the steps to set up your password. Then log in using your email address and the password you set.
Click the Locations tab and confirm your AED’s location is listed. If not, add the new location (Location Group, Site and Building).
Click the Monitored AEDs tab and confirm your AED is listed. If not, click on the Add Monitored AED button. Complete the form using the Sentinel ID, the Location Group, Site and Building where the AED is located, the AED’s placement location (e.g., cafeteria, front office, warehouse), and the AED battery and pads expiration dates gathered during preparation. Then click Save.
These instructions describe how to install the AED Positioning Bracket, place the AED, and aim, attach and activate the AED Sentinel Monitoring Camera inside an AED cabinet. If you are installing the Camera in a Mobile Monitoring Case, proceed to section D.
Install the AED Positioning Bracket
The Positioning Bracket is attached to the inside of the AED cabinet to consistently secure the AED in a precise, repeatable location, ensuring its status indicator is always directly aligned with the Camera lens.
Note: For Defibtech AEDs, a different bracket is required. Contact Readiness Systems Support for more information.
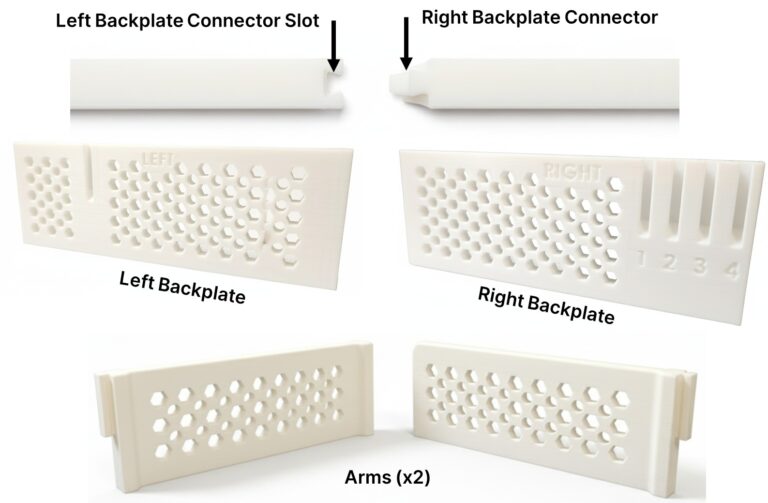
Positioning Bracket Parts
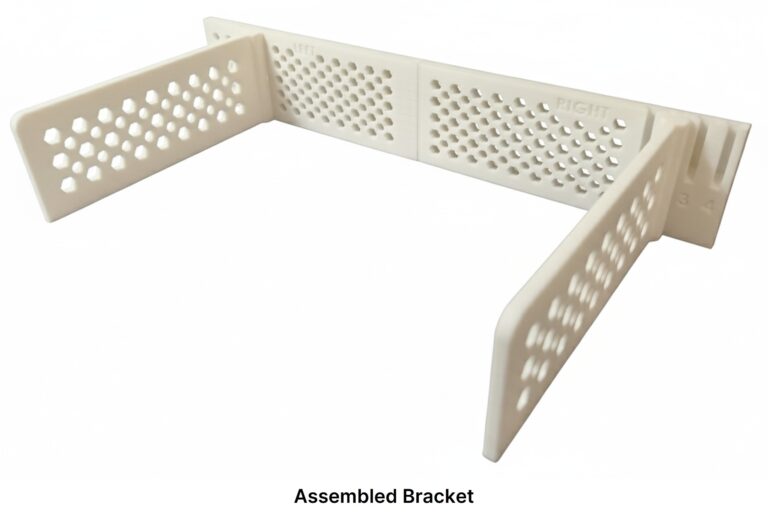
Assemble AED Positioning Bracket
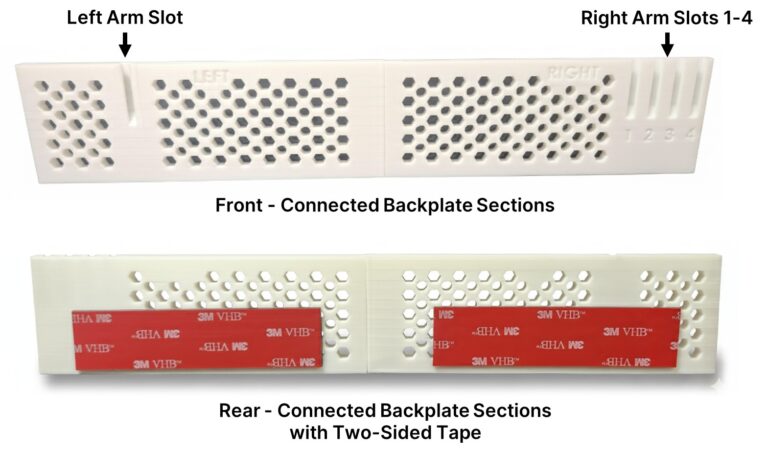
Connect Backplate Sections
To connect the backplate sections, slide the RIGHT backplate male connector into the LEFT backplate female connector slot.
Attach Positioning Bracket Arms
Insert one arm into the singleslot on the left side of the LEFT backplate section.
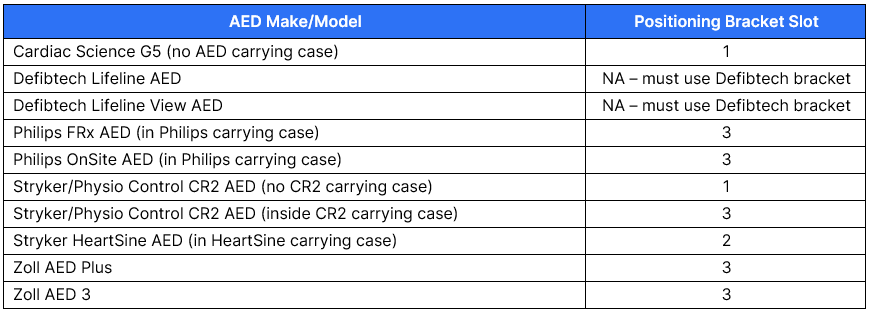
Insert the second arm into one of four slots on the right side of the RIGHT backplate section based on the width of your AED. Refer to the following table for correct slot selection.
Attach Positioning Bracket to Back Wall of Cabinet
Remove the adhesive backing from the two-sided tape on the back of the LEFT and RIGHT backplate sections.
With its bottom edges of the backplate and arms resting on the cabinet floor, and the left edge of the LEFT backplate section against the left wall of the cabinet, press firmly to secure the adhesive to the back wall.
Place the AED
Place the AED inside the cabinet, centered between the positioning bracket arms
Ensure there is nothing beneath, behind, or in front of the AED that could block its status indicator.
Close the AED cabinet door
Aim and Attach the Camera to Inside of the Cabinet Door
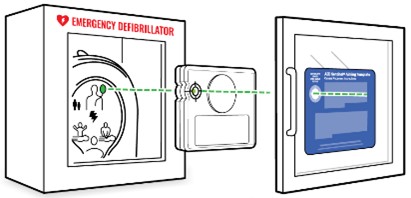
It is critical for the Camera to be carefully aimed and precisely attached to the inside of the cabinet window. Please closely follow these instructions so that a well-centered image of the AED’s status indicator is captured every day.
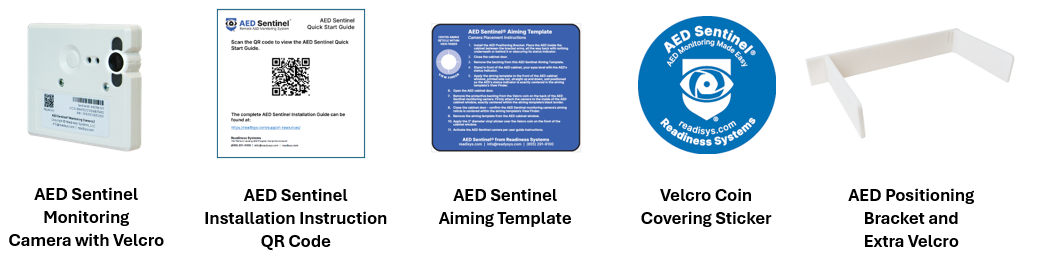
Find the AED Sentinel Aiming Template
Retrieve the AED Sentinel Aiming Template. You will use this to determine where on the AED cabinet window the Camera should be attached to be properly aligned with the AED’s status indicator.
Determine the proper orientation for the Camera
In most cases, the Camera will be attached to the window in the standard “landscape” orientation as shown here.
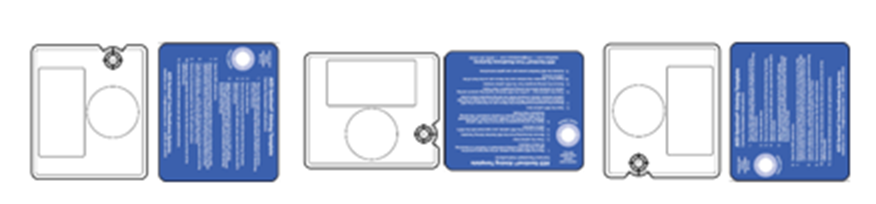
In some cases, the AED is too large or the cabinet too small to accommodate the Camera width. In these cases, the Camera can be attached in a non-standard orientation. Determine which orientation will work best with your combination of AED and cabinet.
If one of these non-standard orientations works best, please apply the 1” square Velcro reinforcement to the corner of the Velcro side of the Camera. This will compensate for the uneven weight distribution of parts within the Camera.
Apply the Aiming Template and Attach the Camera
Follow the instructions on the Aiming Template to apply it to the outside of the AED Cabinet Window.
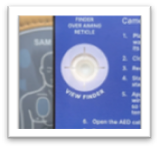
Make sure the AED’s status indicator is exactly centered in the Template’s View Finder, and the Template is level before you attach the Camera
After attaching the Camera, verify the Camera’s aiming reticle is centered within the Aiming Template’s View Finder. Adjust if necessary.
Place the 2″ diameter Velcro coin covering sticker to the outside of the AED window, directly over the Velcro coin.
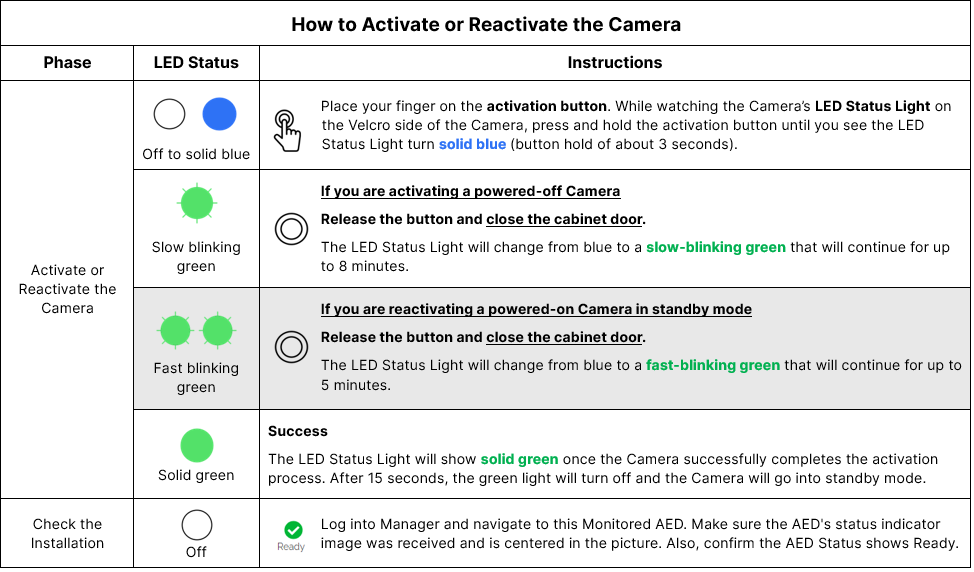
Activate the Camera
Open the cabinet door.
Press and hold the Camera’s activation button until you see the LED Status Light turn solid blue (about 3 seconds).
Release the button and quickly close the cabinet door. The LED Status Light will then blink green during the activation process which will continue for up to 8 minutes. The LED Status Light will then show solid green for 15 seconds, then turn off, indicating success.
–
Log into AED Readiness Manager, navigate to your Monitored AED, and confirm the AED’s status indicator image was received and is centered in the picture.
D. Install AED Sentinel in a Mobile Monitoring Case
These instructions describe how to place and activate the AED Sentinel Monitoring Camera inside a Mobile Monitoring Case (“Case”) that was customized for your AED. If you will be installing the Camera in an AED cabinet instead, please refer to section C.
Prepare the AED Sentinel Camera and Case
On the Camera, remove the scratchy hook-side Velcro from the soft loop-side Velcro coin and discard. The loop-side Velcro coin remains attached to the Camera.
Place the AED in the foam cut out at the bottom of the Case so that its status indicator is facing outward.
Locate the Camera cutout in the lid of the Case. Detach the Velcro straps from each other if necessary.
Activate, then Insert the Camera into the Case
Press and hold the Camera’s activation button for about 3 seconds until you see its LED status light turn solid blue. Release the button – the LED status light will begin slow-blinking green.
Immediately attach the Camera inside the lid cutout, oriented so the Camera lens on the button side of the Camera sits directly over the AED’s status indicator when the lid is closed.
Firmly secure the two Velcro straps snugly around the Camera and close the lid. The activation process will continue for up to 8 minutes.
Log into AED Readiness Manager, navigate to your Monitored AED. Wait 8 minutes and then confirm the AED’s status indicator image was received and is centered in the picture.
E. More Details About AED Monitoring Camera Activation, Reactivation, Power-Off and Troubleshooting
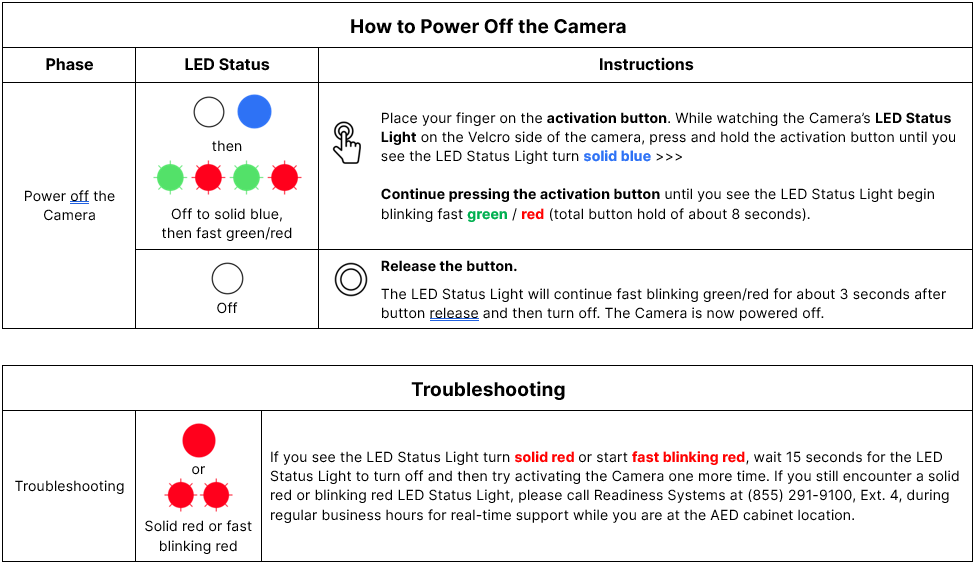
Troubleshooting:
If no image appears in the Monitored AED record after a full 8 minutes, try activating the Camera one more time.
After another 8 minutes, if no image appears again, please call Readiness Systems at (855) 291-9100, Ext. 4, during regular business hours for real-time support.
Please provide the following information to report an AED use. This report should only be submitted by Readiness Systems customers or partners that subscribe to our medical direction and use reporting services.
Please submit this form. We will contact you if we have questions or need further information.